Autotile Pipeline
Overview + Quick Start #
I created some tools to reduce the friction of importing AutoTile assets into Unity. If the art is made in a specific format (in this case RPGMaker's A2 sheet), using one of these tools will remove all or most of the user interaction required to make a RuleTile for use in your game.
The easiest starting point is Implementation 1 - Fullsized Tiles, so if all you want is what I've described, check out the Github README for basic usage.
However, if you find that The Fullsized Tiles generate a bit too many textures for your liking, take a look at Implementation 2 - Subtiles, which perhaps requires a bit more effort to setup, but won't generate any textures beyond the source asset.
If you're interested in the project as a whole: Take a look at the Working Project, and read on.
Goal #
RPG Maker has a real nice "auto tile" system, whereby you load in a fairly simple asset and when you use the tile generated by that asset to draw on the Tilemap, it automatically renders each tile such that it is aware of its local neighbors.
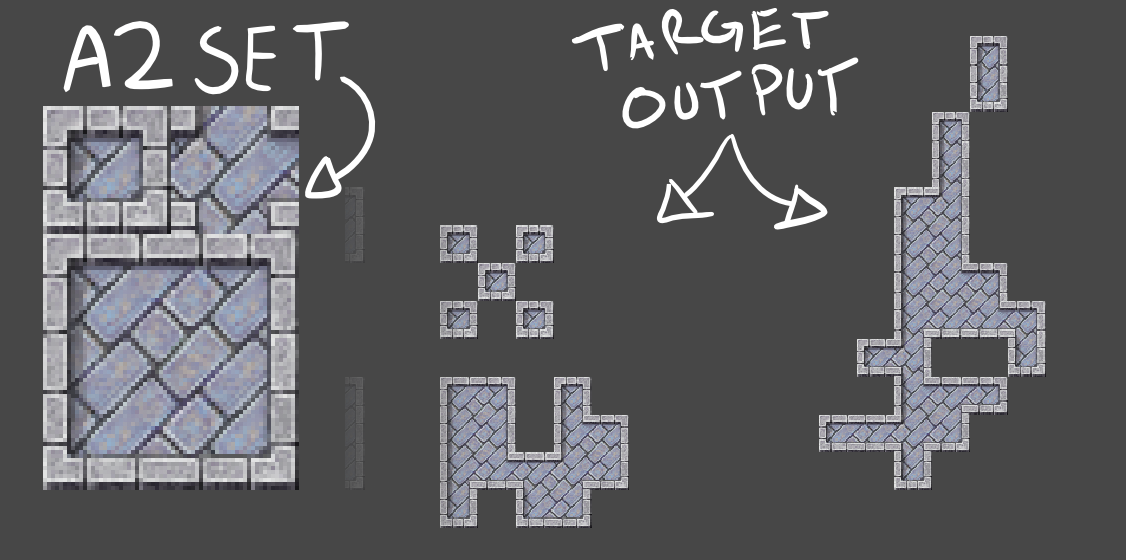
This is generally known as AutoTiling, and will be referred to as such in this article.
I set out to duplicate the functionality of RPGMaker's AutoTiling - specifically what is commonly known as their A2 sheet, shown above. I was surprised to find that while Unity accommodates the creation of these AutoTiles, a few layers of complexity prevent it from being as smooth as RPGMaker's UX.
My goal was to familiarize myself with the Tilemap pipeline by making it as low-effort as possible to convert an RPG Maker A2 Tileset PNG into a Unity RuleTile.
Obstacles #
Obstacle 1: 2D-Extras #
Unity introduced its 2D Tilemap system some time ago, and it comes with very customizable tiles and brushes. It's a great system, but it doesn't come with everything out of the box - you have to find their 2D-extras repository on GitHub to really dig in to the common use cases for the flexibility it provides. This is a pain, as it seems like most of the demos of this system I've seen have centered around the RuleTile, which isn't even in the core feature set. Odd.
Obstacle 2: RuleTile's Interface #
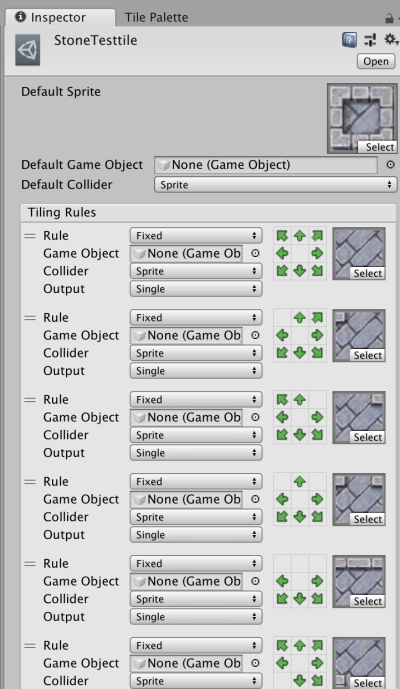
This is an obstacle I expected to find. Based on previous reading, I knew that to use Unity's RuleTile meant to use their custom inspector. While the inspector is very pretty, manually creating each rule takes an unreasonable amount of time - there are 256 possible combinations with 2 states in 8 directions. That assumes we are using 2 states (we are!) but Unity throws a curve ball by adding a "don't care" state on top! The total possible permutations rises to 6561. We only care about 2 states, but even 256 permutations is too many: RPGMaker's AutoTiler only actually cares about 48 of these permutations.
Once those rules are set, we need to assign a sprite to each rule. That means having a folder of several sprites, and manually dragging them to the Sprite Field on the inspector. This is a lot of friction between finishing the art and being able to paint tiles with the art, and it must be done for each unique Tileset. The crux of this exercise was, given a known Tileset layout, remove all of the friction of turning a Tileset into a RuleTile.
If you're interested in reading further about how AutoTiling works, check out these links: Adventures in Bitmasking and How to Use Tile Bitmasking to Auto Tile Your Level Layouts. There is a lot of literature on the bit masking involved in AutoTiling, but this exercise pertains specifically to replicating RPGMaker's functionality in Unity.
Obstacle 3: RPGMaker's Filthy Lies #
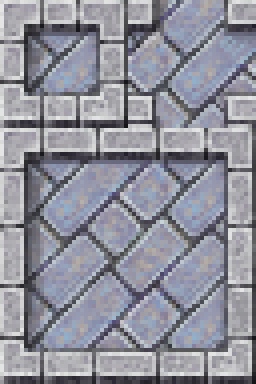
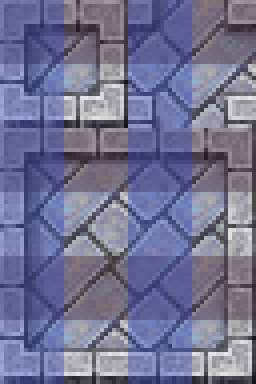
Keen readers may have already perceived 6 tiles total on the A2 sheet, yet the AutoTile process calls for 48 unique tiles! RPGMaker is doing something fishy here... I used a sample Tileset - what appears to be 6 32x32 tiles in a 2x3 grid (thus a resolution of 64x96). Note the highlighted Tile in the example screenshot.
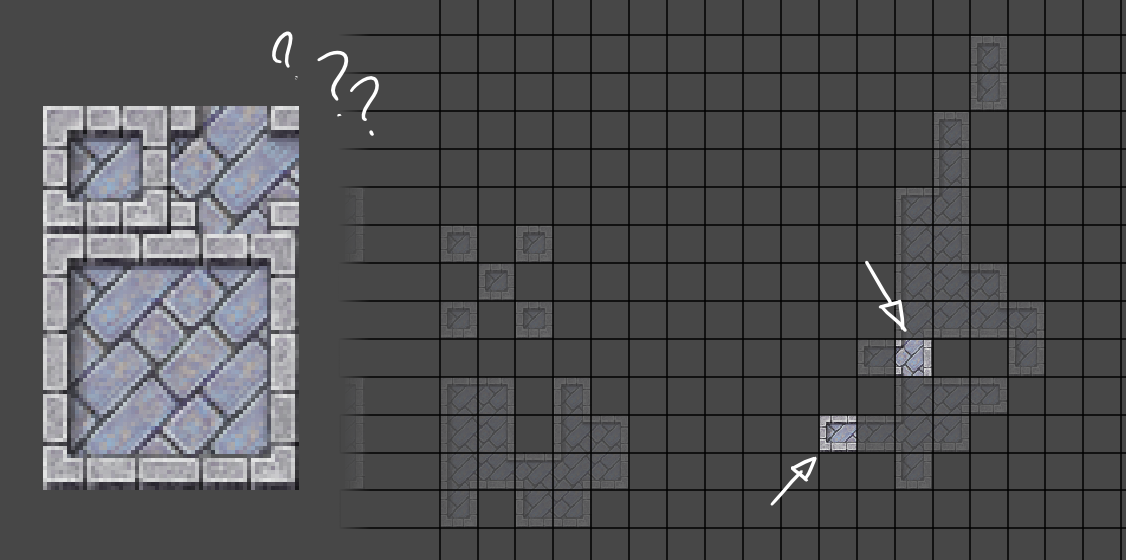
The highlighted tile doesn't actually exist in the base atlas! Now, I don't know the implementation details of how RPGMaker actually performs this, but my mental model suggests that while the UX + Source asset of RPGMaker treats these tiles as 32x32, the tiling engine actually paints them as 16x16 tiles - each full-sized tile is actually 4 Subtiles. I refer to these with cardinal shorthand - NW,NE,SW,SE.
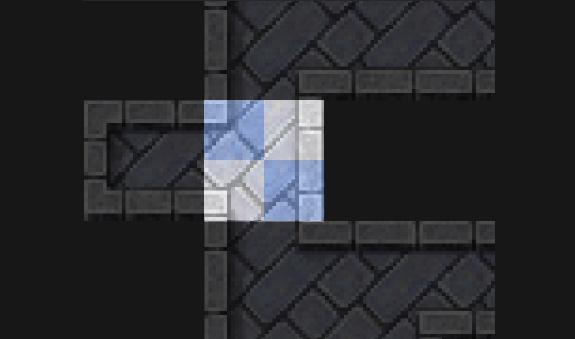
This means the A2 Tileset actually generates 48 usable full-size tiles from a pool of 20 subtiles. The top left full-size tile is actually just a preview for RPGMaker's palette window, it remains unused in the actual tile painting and rendering at runtime as it's 4 subtiles are contained within the bottom 4 tiles.
I knew early on I'd have to manually assign the quads to each rule, as there are too many layers in the translation to do it smoothly / mathematically.
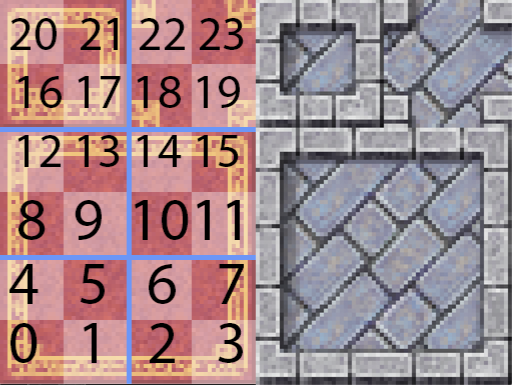
I also discovered that the tiling edges matter: in the first tile set shown above, there is no discernible difference between Subtiles 9,10,5 & 6. However if you simply cut the four of them out of the set and used them like that, it would be fail to adhere to the tiling edges. In the case of this example, the carpet may line up, but the flagstones in the other set would fail to align correctly.

Subtiles 5 & 6 should be at the Top Right and Top Left respectively of any tile they are a part of, and the same goes for 9 & 10 on the bottom Right and Bottom Left respectively. If we are listing them clockwise from the NW, [9,10,5,6] should actually be rendered as [6,5,10,9]. The blue lines help visualize the outward facing edges of each subtile.
Since we know each subtile needs to appear in its target tile in the same local quadrant it occupies in the Tileset atlas, we can simplify the mapping to the following for the sake of manually assigning quads.
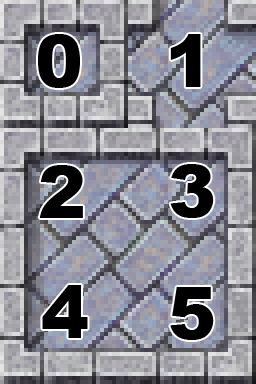
Now that we understand the functionality reasonably well, the most straightforward solution presents itself to us: lets generate these 48 full-sized tiles from our pool of 20 subtiles.
Implementation 1: Full-sized Tiles #
Target Output #
The Ideal result of the full-sized tiles implementation is that a developer should be able to perform a single action (ideally a right-click menu item) on an A2 PNG and immediately be served a RuleTile generated from that asset. Spoilers: I did it. Double Spoilers: I hate it.
Step by Step #
The first step for any of these solutions is simply to generate the rules for the RuleTile. This is sort of an inversion of the standard AutoTiling bit mask: while looping through 0-255, given an integer value, which tiles should be occupied for this rule? We have some real ugly code for removing the rules we don't care about, but code elegance is just a small cost for reducing our total rule count by over 200 redundant rules. This is the GetRule(int neighbourMask) function in ImportAutotile.cs, and it is used in both implementations.
We then need to generate a sprite for each rule, using a lookup table. I've made my lookup tables ScriptableObjects for a few reasons - most importantly, a custom inspector ensures I can make the job of setting up the subtile indices as painless as possible. Ultimately, the actual object is just an array of integers for subtile indices and a list of TilingRules for nicely visualizing what rule + quad each indices belongs too. Users of this tool for an A2 Tileset don't need to edit this ScriptableObject at all, but if you were to make a lookup table for a different style of Tileset, it may be handy.
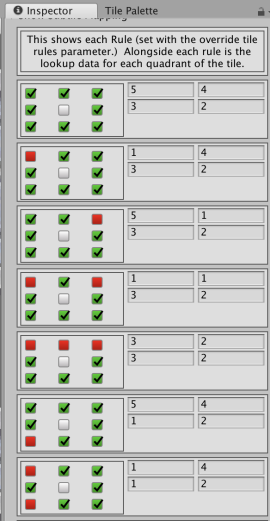
So as we generate a sprite for each rule (see GenerateSprite(int neighbourMask, int res, Texture2D source, AutoTileLookup lookup, string folderPath) in ImportAutotile.cs), we grab the values from our lookup table, convert them from Tile indices to Subtile indices based on their quadrant, then we generate a new Texture2D, grab the pixels from the appropriate quads and use SetPixels to write the new texture. we save this texture with the mask value in the filename.
We do a quick save and refresh of our asset datatbase to be sure the files are imported correctly and have their metadata populated, then we simply iterate through the rules, loading the sprite we generated based on the tilemask for each rule. Once we've assigned the sprites to the rules we save the RuleTile and voila! - a functioning RuleTile from our source atlas.
Problems #
Usage #
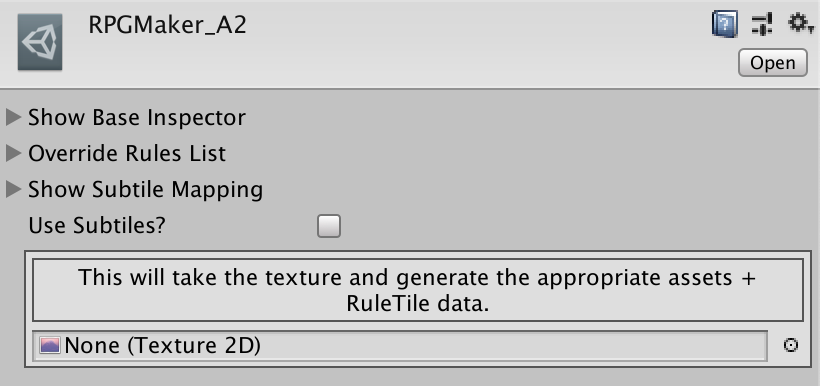
First of all, you'll notice this operation is performed upon a PNG but also requires the lookup table data. The nature of my role as someone who will have to make a few different lookup tables meant I didn't want to make this a simple Right Click -> Generate Autotile script, as I want to provide 2 pieces of information to the function: the actual PNG, and the lookup table. Thus, I actually trigger the operation with a Sprite Field on the lookup table's ScriptableObject which then triggers the function when you drag a sprite to it. This is a minor detail though, and should require very little legwork to make it work with a right click.
Texture Memory #
This is the big con. At best, this method results in a new 256x256 texture atlas full of all 48 fullsize tiles. This is a lot larger than the 64x96 atlas we started with. It also means we need to do something with this smaller source asset we used to generate all these tiles. It irked me to delete this smaller source file once i had generated the behemoth atlas used to drive this RuleTile.
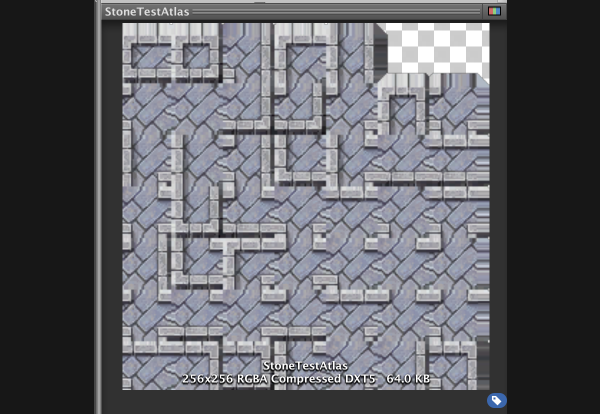
Surely, I thought, there must be a better way. if this giant atlas came from these 32x32 tiles generated from a smaller atlas' 16x16 subtiles, couldn't we use the same source atlas to drive our AutoTile?
Implementation 2: Subtiles #
Target Output #
Rather than view the solution through the lens of the full-sized tiles that we perceive, what if we saw the solution through the lens of the smaller subtiles that we actually use in our implementation? if we could somehow paint each subtile individually while conforming to the rules + position needs of the full-sized tiles, we'd have nearly the same functionality without generating a large atlas - in fact, we could use the source asset.
Our goal for this implementation is to generate a brush at subtile scale - in this case that's a 16x16 tile - that gives us the same visual output as the initial implementation without generating any new textures.
Step by Step #
First of all, if we aren't generating new textures, we need to import the source texture properly. we do this in ProcessSubtileTexture(Texture2D _texture, AutoTileLookup _lookup) of ImportAutotile.cs. we make sure to import the Texture2D as containing multiple sprites, then use our known measurement to slice the sprite in code based on the size of the Subtiles.
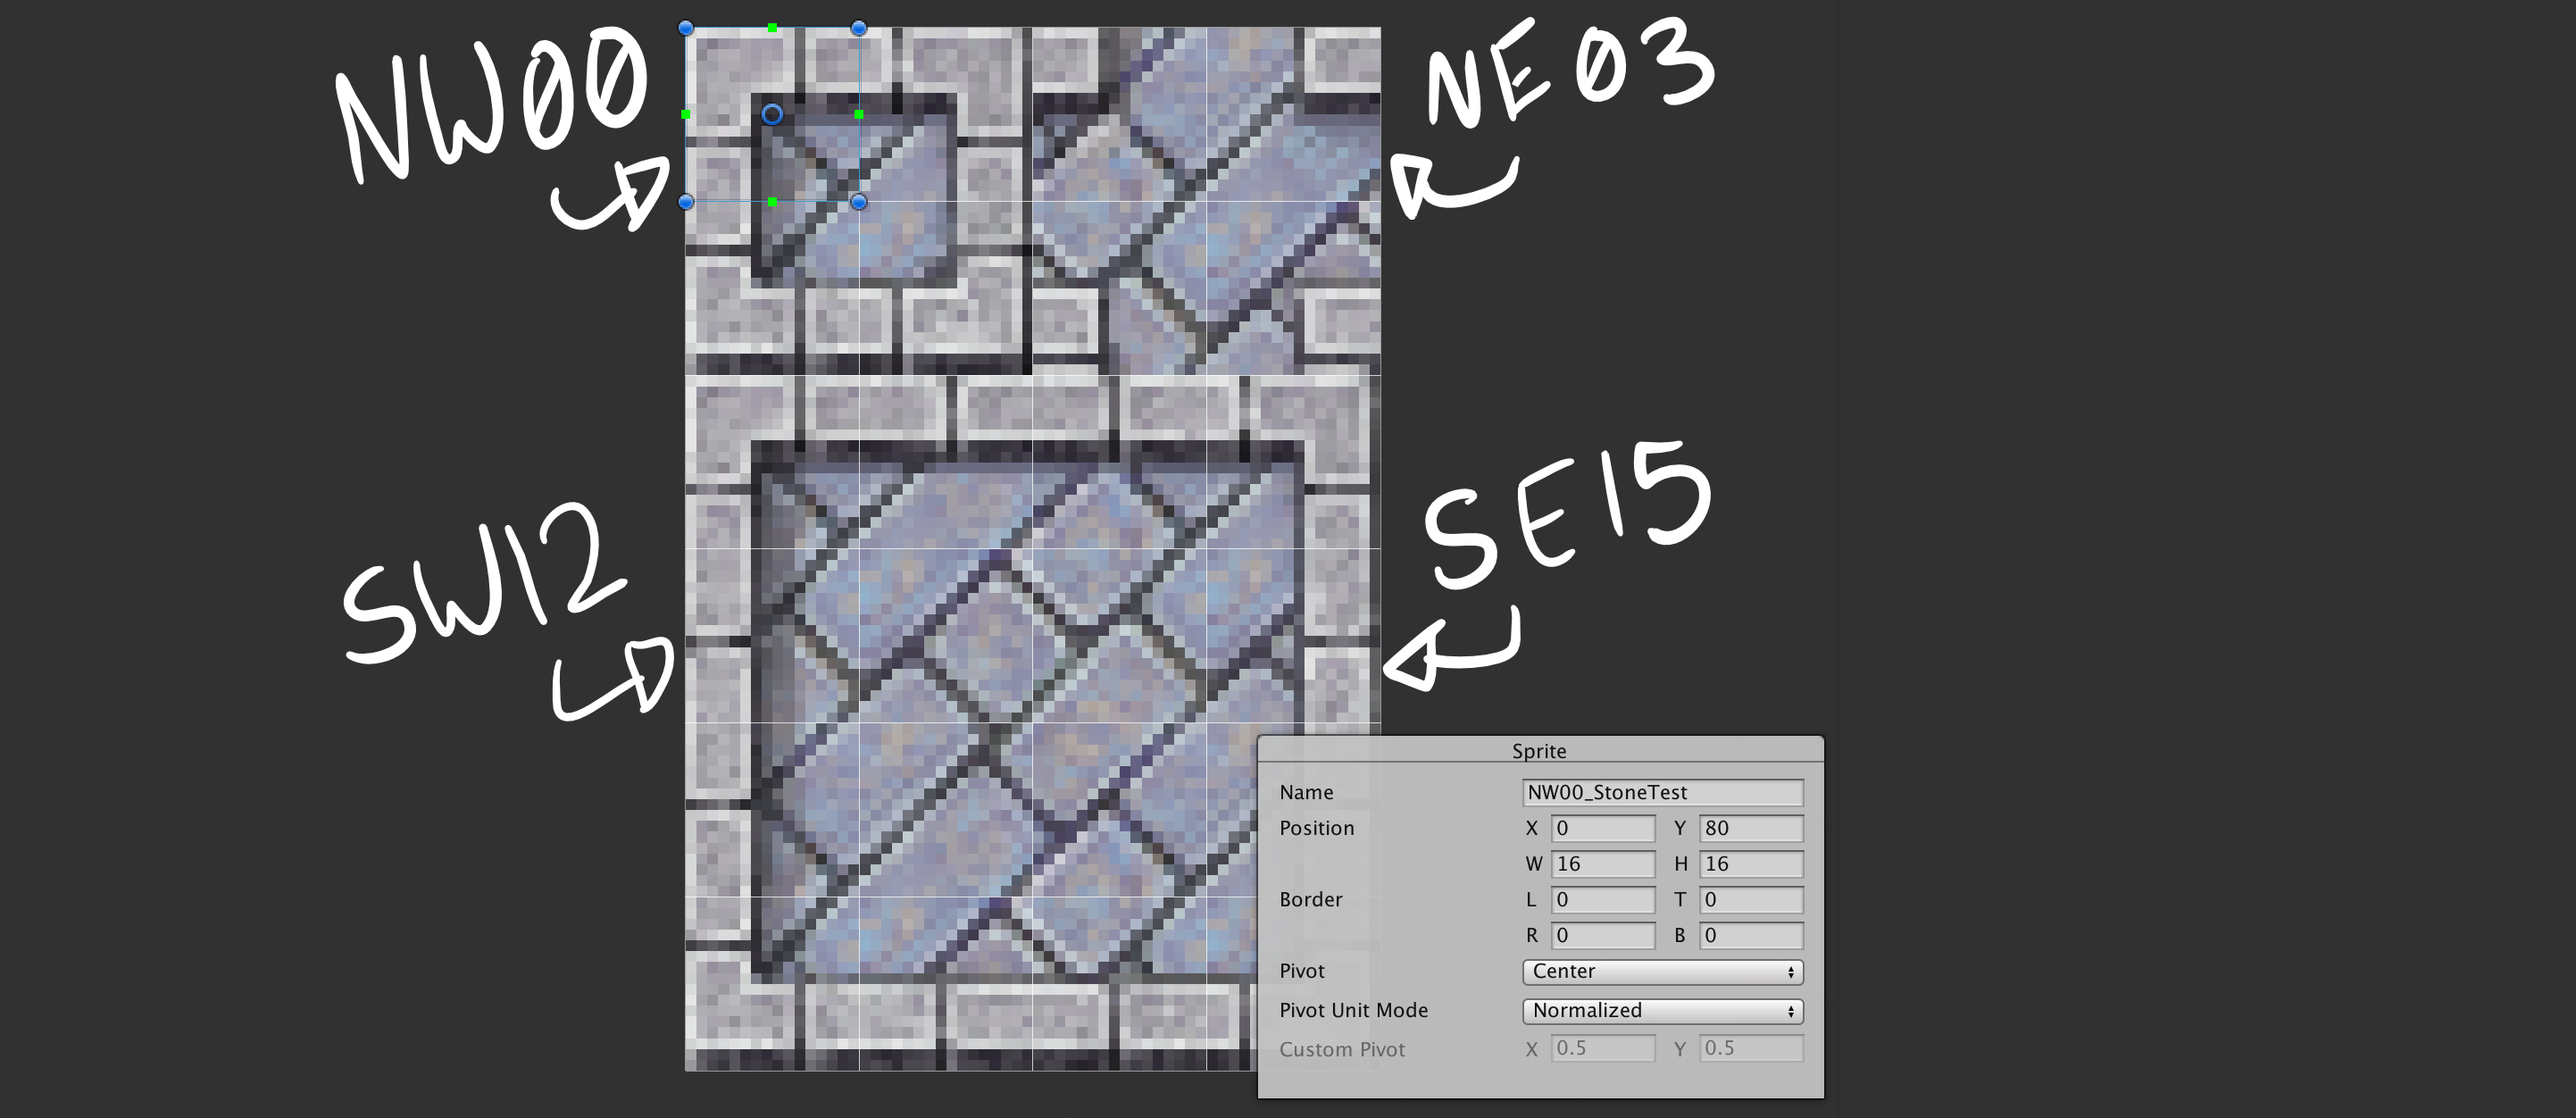
In this case I name them based on which Quadrant they are in and their Subtile ID. After assigning the sliced metadata to the sprite sheet of the Texture2D, I re-import the whole thing and use LoadAllAssetsAtPath(path) to make sure I load the individual Sprite assets at that path. I sort them by name because the naming scheme used above means each subtile will be stored in it's own part of the list, from lowest Subtile ID to highest. I then generate the RuleTile and it's TilingRules exactly as was done previously.
Each Rule now needs 4 tiles, though: one for each Quadrant. At this point I realized I hadn't thought this through at all, but remembered that the RuleTIle supports multiple sprites for animation, or random placement. poking into the source code for RuleTile.cs in the 2d-extras repository, I discovered SpriteOutput, an enum that you can use to determine which tile in the List of Sprites gets placed for each rule. Since GetTileData(Vector3Int position, ITilemap Tilemap, ref TileData tileData) receives the tile's world position, we can return which ever tile we want dependent on world position. using a couple of mod operations, we can sample from the list of tiles based on whether the world grid index is even or not.
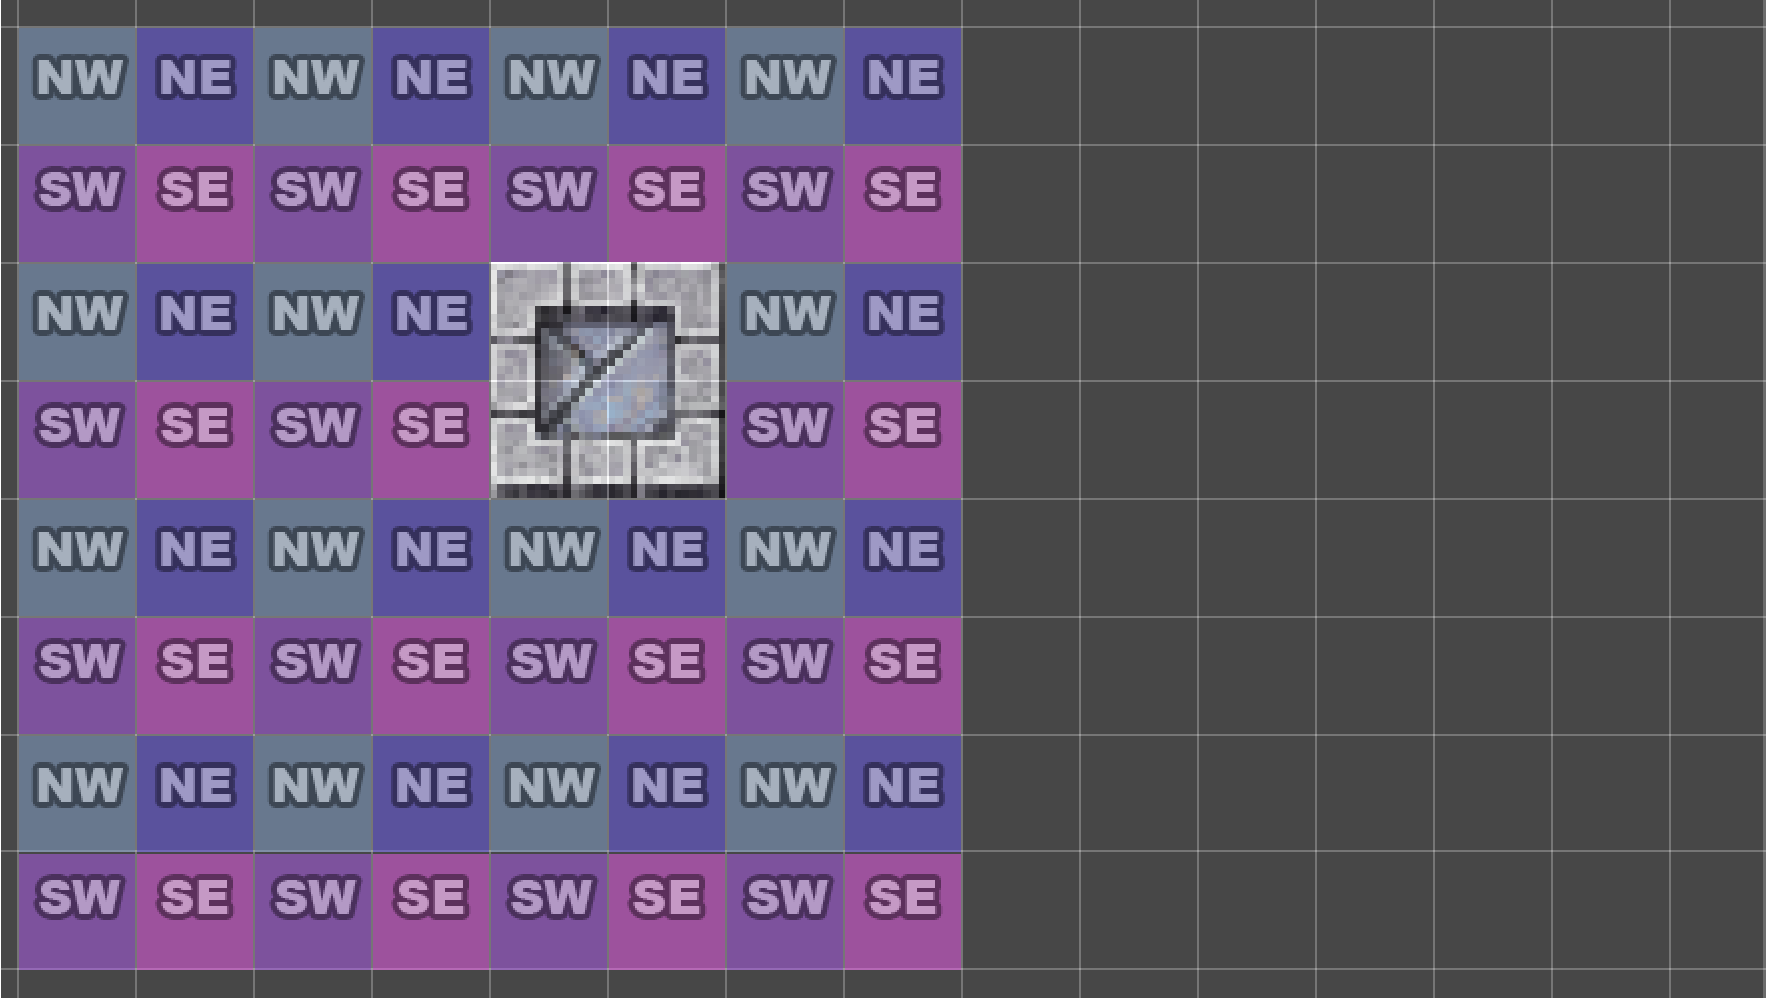
So we throw some custom inspectors in there, and now each TilingRule in our RuleTile accepts 4 images: SW, SE, NW, NE. With these additions to the RuleTile.cs (and some niceties in RuleTileEditor.cs), we can create and paint with a Modulo SpriteOutput.
Now our AddSpritesToRule(ref RuleTile.TilingRule _rule, List<Sprite> _sprites, int _ruleID, AutoTileLookup _lookup) merely has to transform its tile indices to subtile indices based on which quadrant of the TilingRule it applies too. We add these TilingRules to our RuleTile, and woosh! - processing an A2 PNG file slices the atlas for you and generates a RuleTile ready to be used on a subtile-scale grid.
Problems #
Usage #
This is the same as Implementation 1. First of all, you'll notice this operation is performed upon a PNG but also requires the lookup table data. The nature of my role as someone who will have to make a few different lookup tables meant I didn't want to make this a simple Right Click -> Generate Autotile script, as I want to provide 2 pieces of information to the function: the actual PNG, and the lookup table. Thus, I actually trigger the operation with a Sprite Field on the lookup table's ScriptableObject which then triggers the function when you drag a sprite to it. This is a minor detail though, and should require very little legwork to make it work with a right click.
Setup #
There's a minor bit of friction when setting up, your Tilemap needs to have half-scale tiles - so if your pixel-per-unit is 32 and your tiles are 32, then you'll need your Grid Component's cell size to be 0.5.
Painting the AutoTile #
Initially, this adds some operational friction to the act of actually painting with the RuleTile. Namely, you'd be able to paint a quarter, half or three-quarter fractional tile that will look terrible, as it's meant to be painted alongside its entire tile. Since the Tilemap is at subtile resolution, painting is at subtile resolution as well. Also, even when painting with full tiles, you need to make sure you are not painting offset to the global modulo grid. That is too say, if you are trying to place a NW or SW tile at an odd global grid index, it will try to paint the NE or SE variant of that tile's current rule. See the gif below for some of the problem one might run into.
Luckily, Unity's Tilemaps also let you write custom brushes, so it's minimal work to write a brush that forces the tiles you paint to adhere to the modulo grid as if you were painting fullscale tiles rather than subtiles.
Having the tilemap at half res has runtime concerns though, especially for games with things like destructible terrain. The other flaw here is that using the modulo brush means you can't use other types of brushes (unless you make a modulo version...). Likewise for the RuleTile's Modulo SpriteOutput, which prevents you from painting with Random or Animated Tiles (Again, unless you write a modulo variant of these).
I thought I had these problems solved as well, but Unity's Sprite implementation lacks a critical feature.
Failed Attempt: The Impossible Dream #
Target Output #
I'd assume it is possible to generate a single Sprite that contains a mesh, split into four quads, that each sample from the source texture as necessary - this way we can paint at full-size resolution without generating a ton of texture bloat. We know that Unity's Sprites support some level of custom mesh, because you can edit it in the editor, so I thought this would be the ideal solution.
Custom Mesh #
This seems doable: Unity's Sprite documentation shows a function called OverrideGeometry(Vector2[] vertices, ushort[] triangles), which should allow us to set up the mesh as we need. However, a line in The Documentation scared me: Sprite UV's are calculated automatically by mapping the provided geometry onto the sprite texture.
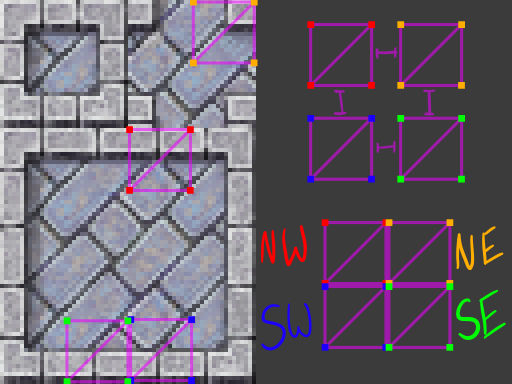
Custom UVs #
I had hoped that those auto-generated UVs could be overridden somewhere, but it seems that they can't. Without custom UVs on the Sprites custom geometry, this idea is sort of a dead end - barring some custom shader work that I wanted to avoid.
In Closing #
I'm not super jazzed about any of this, really. It seems like we should be able to feed our own UVs into a Sprite's mesh to manually sample from the atlas in a more flexible way, but here we are: 2 solutions for rapid AutoTile generation in Unity. One favors simplicity, and one favors texture memory. Thanks for reading! Thanks Mack, for proofreading + editing!
- Previous: Frame-based Animator Generator
- Next: NodeMaps
